To reconfigure the operating frequencies of your digital microphone system, please follow these steps:
Important!
When setting up one microphone, the second one must be turned off to avoid interference and synchronization errors.
1. Unlock the receiver
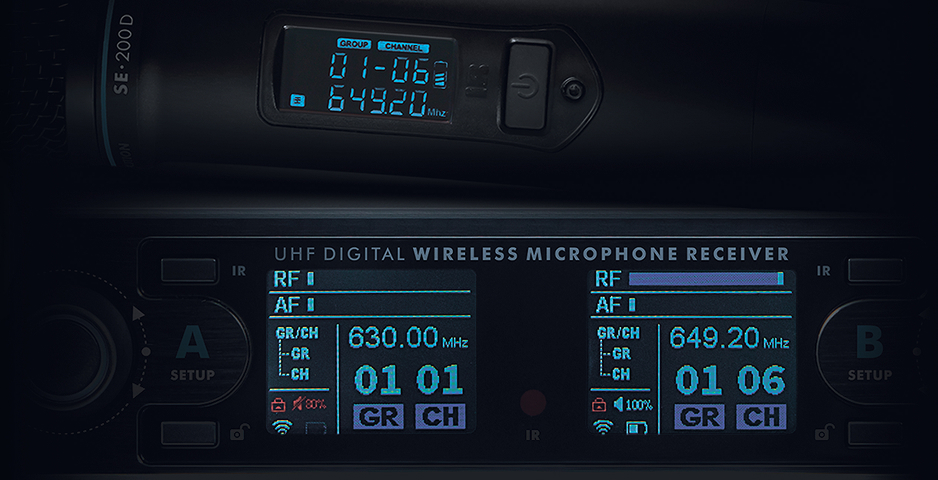
Press and hold the button with the open lock icon (A or B setup – depending on which microphone you are configuring). When the red indicator (closed lock) on the display changes to white (open lock), the device is ready for setup.
You have 3 seconds before the lock is activated.
2. Select the parameter
Press the round button for the receiver channel to enter group (GR) or channel (CH) selection mode.
3. Set the frequency
Turn the round button to select “Group” (GR) or “Channel” (CH), then press the round button.
Turn the button left or right until you find the desired frequency, then press the joystick again to lock in the setting.
4. Sync the microphone with the receiver:
4.1. Turn on the microphone you want to synchronize with the receiver (the second microphone must be turned off).
4.2. Press the IR button for the receiver channel on which you changed the frequency (the red indicator will start flashing).
4.3. Hold the microphone display close to the flashing indicator on the receiver.
4.4. After a moment, the microphone will automatically accept the new settings and save them.